
Faux concrete walls can look incredible when they’re done right—I’ve seen them transform plain drywall into something that feels custom and high-end. But here’s the part most guides skip: there are situations where faux concrete is the wrong choice, and forcing it almost always leads to regret.
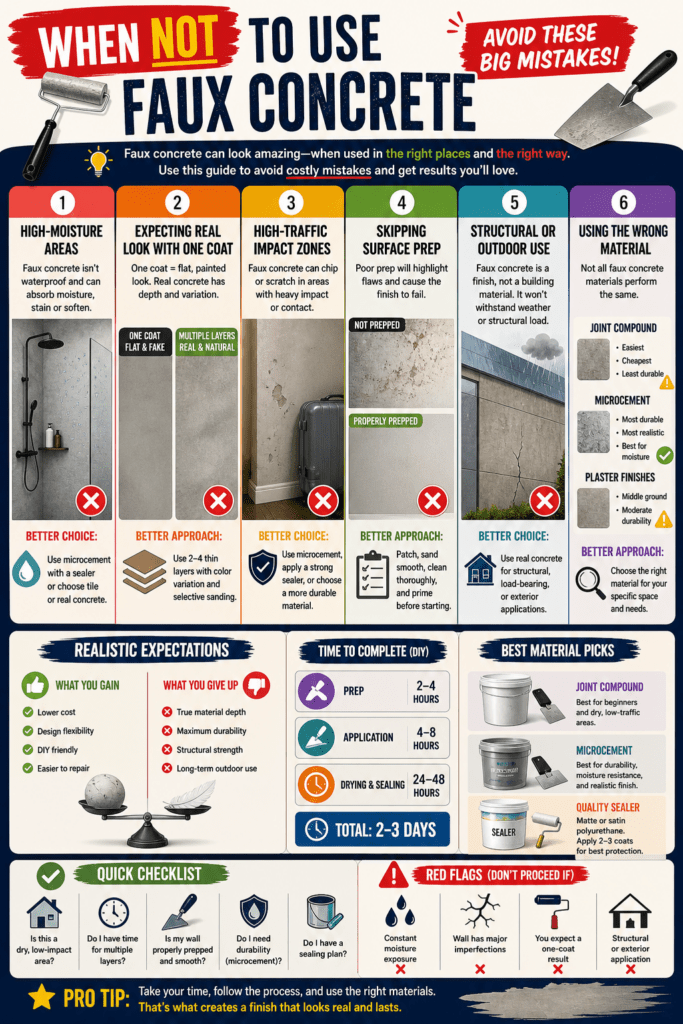
If you’re trying to decide whether to move forward, this will save you time, money, and a lot of frustration.
Mistake #1: Using Faux Concrete in High-Moisture Areas (Without Proper Protection)
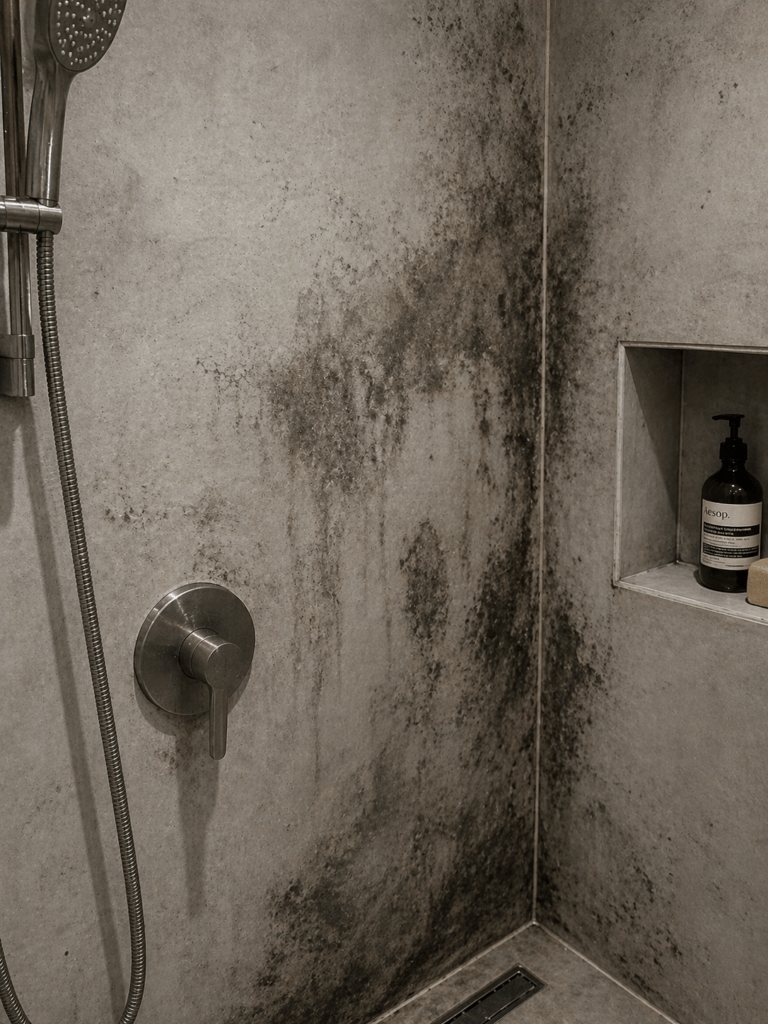
This is the fastest way to ruin your finish.
Faux concrete—especially joint compound-based finishes—is not naturally water-resistant. In areas like:
- Shower walls
- Behind sinks without backsplash protection
- Outdoor exposed walls
…it can absorb moisture, stain, or even soften over time.
What to do instead:
- Use microcement if you need water resistance
- Apply a high-quality sealer (2–3 coats minimum)
- Or skip faux entirely and use tile or real concrete
👉 If you’re planning a DIY approach, start here:
https://www.concretewalldesigns.com/how-to-create-a-faux-concrete-wall-with-microcement/
Mistake #2: Expecting It to Look Real With One Coat
This is where most faux concrete projects fail. A single layer of gray compound = painted wall, not concrete.
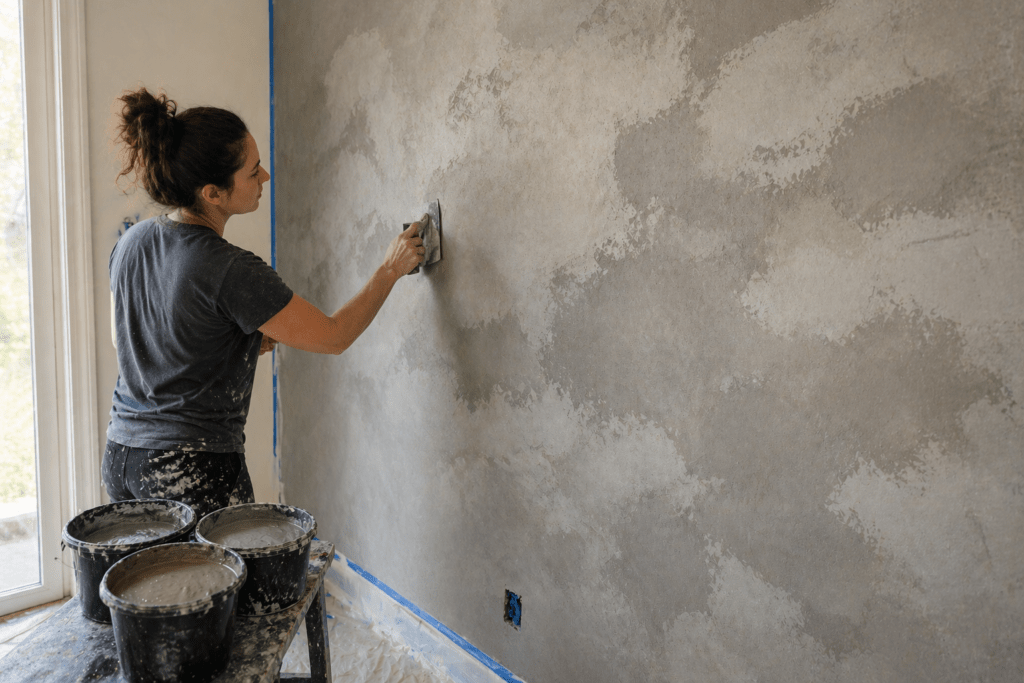
Real concrete has:
- Depth
- Color variation
- Subtle texture changes
If you don’t build those layers, it looks flat and fake.
Reality check:
- Plan for 2–4 thin layers
- Use multiple tones (light + dark passes)
- Sand selectively—not evenly
👉 This breakdown helps avoid the “paint look”:
https://www.concretewalldesigns.com/why-faux-concrete-looks-like-paint/
Mistake #3: Using It in High-Traffic Impact Zones
Faux concrete is durable—but not indestructible.
In areas like:
- Hallways with furniture contact
- Kids’ play areas
- Garage walls
…it can chip or scratch if not properly sealed.
Better options:
- Use microcement instead of joint compound
- Apply a satin or polyurethane sealer
- Or consider a more durable wall material altogether
Mistake #4: Skipping Surface Prep
This one quietly ruins more projects than anything else.
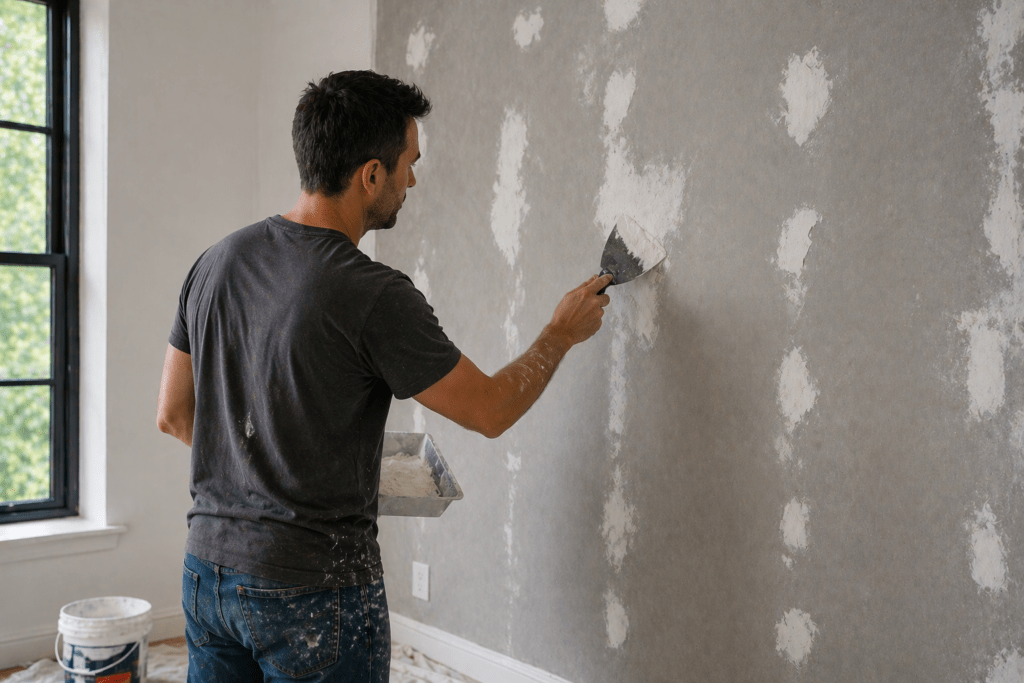
If your base wall has:
- Texture
- Grease
- Flaking paint
…your faux finish will highlight those flaws, not hide them.
What actually works:
- Patch and sand the wall smooth
- Clean thoroughly (especially in kitchens)
- Prime before applying any compound
👉 If you want a solid prep routine:
https://www.concretewalldesigns.com/faux-concrete-wall-prep/
Mistake #5: Using Faux Concrete for Structural or Outdoor Applications
This sounds obvious—but people still try it. Faux concrete is a finish, not a building material.
It should NOT be used for:
- Load-bearing walls
- Retaining walls
- Fully exposed exterior surfaces
Why this matters:
- It won’t handle weather exposure long term
- It doesn’t provide structural support
- Repairs outdoors are difficult and frequent
If you need durability first and aesthetics second, real concrete is the better move.
Mistake #6: Choosing the Wrong Material for the Job
Not all faux concrete materials behave the same.
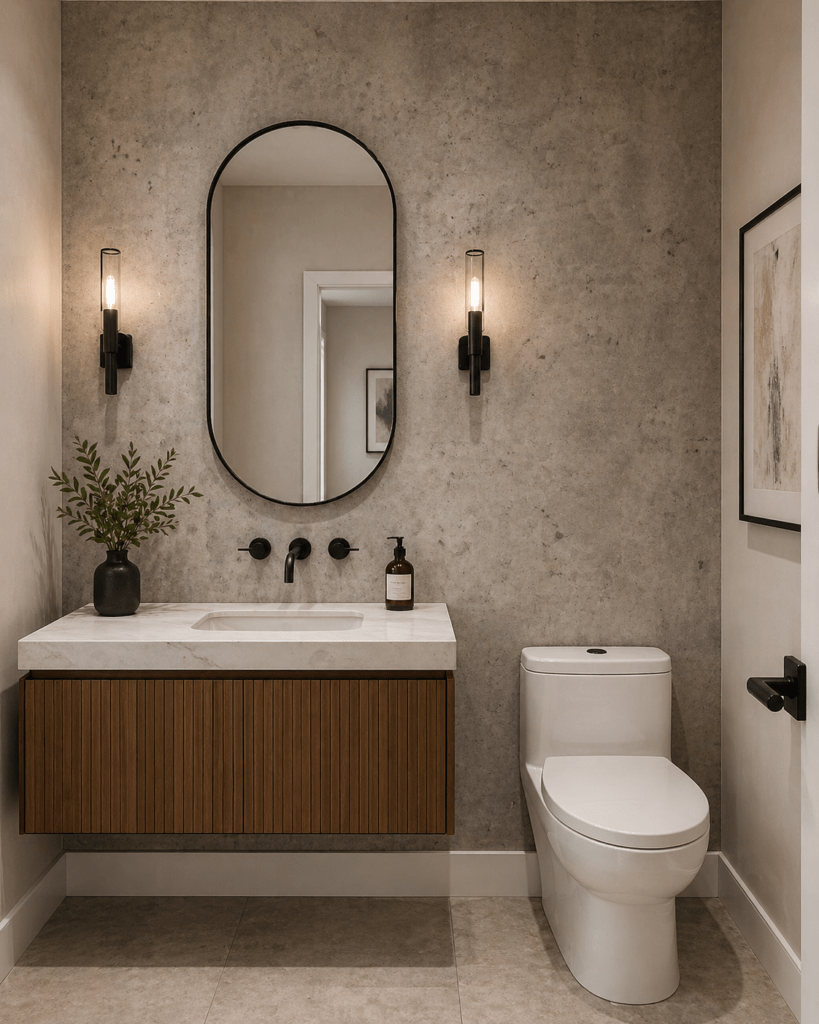
Common options:
- Joint compound: easiest, cheapest, least durable
- Microcement: strongest, most realistic, more expensive
- Plaster-based finishes: middle ground
Decision shortcut:
- Decorative accent wall → joint compound
- Kitchen or light moisture → microcement
- Premium finish → microcement
👉 Compare materials here:
https://www.concretewalldesigns.com/best-faux-concrete-wall-materials/
Trade-Offs You Need to Accept
If you’re going faux, here’s the honest trade:
You gain:
- Lower cost
- Flexibility
- DIY control
You give up:
- True material depth
- Long-term durability (in harsh environments)
- Structural use
That trade is worth it for most interior projects—but not all.
Faux Concrete Cost Calculator
Estimate the cost to create a faux concrete wall, backsplash, or feature area.
Recommended Products
Estimate only. Final cost depends on prep quality, number of layers, materials, and installer skill.
Time to Complete (Realistic)
Faux Concrete (DIY)
- Prep: 2–4 hours
- Application: 4–8 hours
- Drying + sealing: 24–48 hours
- Total: 2–3 days
If you rush it:
Expect visible flaws. This is not a one-day project if you want it to look real.
Product Recommendations (Based on Use Case)
- Beginner-Friendly: Joint compound + drywall knife
- Best Overall: Microcement kits (for durability + realism)
- Sealers: Matte or satin polyurethane (2–3 coats minimum)
Focus less on brand, more on application technique—that’s what determines the final look.
Printable Checklist

Before You Start:
- Is this a dry, low-impact area?
- Do I have time for multiple layers?
- Is my wall properly prepped and smooth?
- Do I need durability (microcement vs compound)?
- Do I have a sealing plan?
Red Flags (Don’t Proceed If):
- Area is exposed to constant moisture
- Wall has major imperfections
- You expect a one-coat result
- It’s a structural or exterior application
Frequently Asked Questions
Can faux concrete be waterproof?
Not by default. It becomes water-resistant only after proper sealing or when using microcement.
Why does my faux concrete look like paint?
Because it lacks layering and variation. Realism comes from depth, not color alone.
Is faux concrete durable enough for kitchens?
Yes—with proper sealing. Avoid direct water exposure areas unless using microcement.
Can I fix mistakes after it dries?
Yes, that’s one of the biggest advantages. You can sand, reapply, and adjust.
Is microcement worth the extra cost?
If you need durability or moisture resistance, yes. For simple accent walls, joint compound is usually enough.
Conclusion
Faux concrete is one of the most effective ways to get a high-end look without the cost of real concrete—but only when it’s used in the right situations.
Most problems don’t come from the material. They come from using it where it doesn’t belong.
If you stick to:
- Interior spaces
- Proper prep
- Layered application
…you’ll get a result that looks intentional, not improvised. Ignore those rules, and it will look like a painted wall—no matter how much time you put in.
More Resources
- American Concrete Institute – https://www.concrete.org
- National Association of Home Builders – https://www.nahb.org
- International Code Council – https://www.iccsafe.org