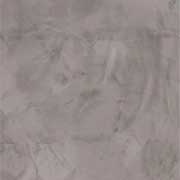
Embracing the trend of concrete aesthetics in interior design has become increasingly popular, adding a touch of modern sophistication to any space. Whether you’re aiming for an urban loft vibe or a contemporary minimalist style, incorporating a concrete look on your walls can instantly elevate the ambiance.

Selecting the Perfect Paint for Achieving a Concrete Look:
When choosing paint to achieve a concrete look on your walls, there are several factors to consider:
- Texture: Decide whether you prefer a smooth or textured finish. Textured paints can replicate the roughness and depth associated with real concrete.
- Color: Choose a shade that complements your overall design scheme. Options are available in various colors like gray, white, or bold hues such as blue or green.
- Finish: Opt for matte or satin finishes based on your sheen preference. Matte finishes offer an authentic flat appearance akin to untreated cement, while satin finishes provide subtle shine without being overly glossy.



Leading Brands Offering Concrete Look Paints
For exceptional results when creating faux concrete walls, it’s essential to use high-quality paint products designed specifically for this purpose. Here are some top brands renowned for their excellent range of paints suitable for achieving a realistic concrete effect:
- Color Atelier
- Vasari
- Meoded Paint
- Sherwin-Williams
- Rust Oleum Specialty
- Behr
Preparing Your Walls for the Concrete Look:
To achieve the best concrete look on your walls, proper preparation is essential. Often overlooked, this step plays a crucial role in ensuring a flawless finish that truly mimics real cement. As an expert in faux concrete wall finishes, I’ll walk you through the necessary steps and provide insights into the tools and materials you’ll need.
The first step to creating an authentic concrete effect is starting with a clean and smooth wall surface. Any dirt, dust, or imperfections will be magnified once the paint is applied. Therefore, thorough cleaning is paramount before proceeding with any other preparations.
Here are some key points to keep in mind when preparing your walls:
- Remove any existing wallpaper or loose paint: Utilize a scraper or putty knife to gently strip away these layers from your walls. Ensure all surfaces are free from peeling paint or debris.
- Repair cracks and holes: Inspect your walls for any imperfections and fill them using spackling compound or joint compound. Allow ample drying time before moving forward.
- Sand rough areas: Smooth out any rough patches on your walls by sanding them down with fine-grit sandpaper until they feel sleek to the touch.
- Thoroughly clean: Wipe down the entire wall surface with a damp cloth to eliminate dust and residue from sanding or repairs.
Now that we’ve emphasized the importance of having a pristine canvas for your faux concrete finish, let’s delve into the tools and materials required for this preparation stage:
- Scraper or putty knife: These tools are indispensable for effectively removing old wallpaper or loose paint without harming the underlying wall surface.
- Spackling compound/joint compound: Use these products to fill cracks and holes in your walls before painting over them.
- Fine-grit sandpaper/sanding block: Crucial for smoothing out rough areas on your walls.
- Damp cloth: Employ this tool to wipe down the wall surface after sanding or repairs, ensuring it’s devoid of dust and debris.
Follow these steps diligently and utilizing top-quality paints designed specifically for achieving textured masonry finishes like acrylics. You’ll establish a solid foundation for attaining that stunning concrete look on your interior surfaces. Remember, proper preparation sets up everything else!
With our walls now primed, let’s move onto applying those finishing touches. Ttransforming ordinary interiors into extraordinary spaces with striking faux-concrete effects!
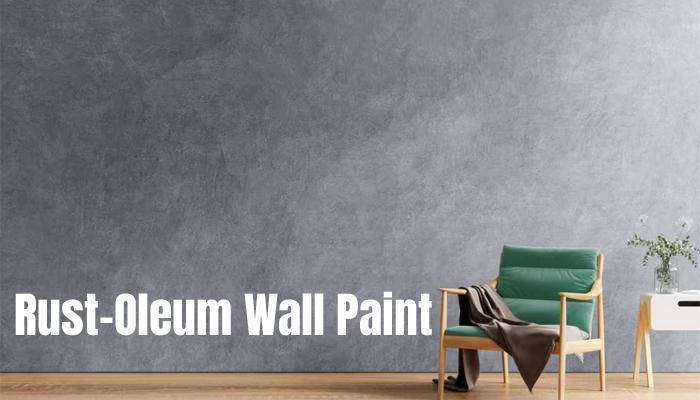
Applying the Paint for a Concrete Look:
Transforming your walls into a sleek, industrial-inspired masterpiece with a concrete finish is easier than you think. By selecting the best paint and mastering the right techniques, you can achieve that desired effect effortlessly. Let’s walk through the step-by-step process of applying paint to achieve a stunning concrete look.
- Set Up Your Workspace: Before starting, protect your floors and furniture by covering them with drop cloths or plastic sheets to avoid any accidental spills or splatters.
- Clean and Prime: Begin by cleaning the walls thoroughly using a mild detergent solution to remove dirt, dust, and grease. Once dry, apply a primer specifically formulated for masonry surfaces to ensure proper adhesion of the concrete-look paint.
- Choose Your Tools Wisely: Opt for sponges or brushes with stiff bristles instead of traditional rollers or sprayers to create an authentic textured finish resembling real concrete.
- Mix Your Paint Correctly: Follow the mixing instructions provided on the label carefully to ensure optimal results based on the brand and type of paint chosen.
- Apply Thin Coats: Apply thin coats of paint initially rather than thick layers all at once for better control over texture buildup and even coverage without drips.
- Layering Techniques: Experiment with stippling or dabbing motions while applying subsequent coats of paint to add depth and dimension to your faux concrete wall.
- Allow Proper Drying Time: Ensure each coat dries completely before proceeding further to prevent smudging or smearing during application.
- Final Touches Matter: Step back after painting is complete to assess if any touch-ups are needed; use a small brush for seamless blending where necessary.
- Sealing (Optional): For added durability against scratches and stains, consider applying a clear sealer as an extra protective layer that also enhances surface sheen if desired.
Remember that practice makes perfect when aiming for an ideal concrete look on your walls – don’t hesitate to experiment until you find what works best for you. With patience and attention to detail, achieving stunning faux concrete walls is within reach!
Tips For Achieving Optimal Results
- Experiment with application techniques using brushes, rollers, sponges, or spray guns to create unique textures and patterns.
- Layer multiple shades of gray paints together for added dimensionality.
- Add subtle accents like faux cracks or weathered effects to enhance authenticity.
Key Points To Remember Before Purchase
- Check product labels for suitability on interior or masonry surfaces.
- Consider factors such as coverage area per gallon, drying time, and recommended number of coats needed for optimal results.
- Read customer reviews online to gauge quality and performance.
Common Mistakes To Avoid When Purchasing
- Not considering surface compatibility: Ensure the chosen paint is suitable for the specific wall material (e.g., drywall or plaster).
- Neglecting proper preparation: Skipping cleaning or priming can lead to poor adhesion and uneven final results.
- Rushing through color selection: Test sample colors in different lighting conditions to see how shades appear.