
Concrete walls are a trendsetting choice in interior design, offering distinct texture and industrial allure that brings contemporary sophistication to any room. Their raw yet refined charm complements various aesthetics, from minimalism to eclectic styles. Concrete’s neutral hues and rugged appeal serve as a versatile backdrop, like a blank canvas for artistic vision.

Beyond their visual appeal, cement walls are exceptionally durable, outlasting traditional paint or wallpaper and withstanding daily wear and tear, making them ideal for high-traffic areas like living rooms, kitchens, or commercial settings.
Concrete’s versatility allows for diverse styles and finishes, from sleek polished surfaces to textured looks resembling exposed aggregate or aged stone. A faux concrete surface adds depth and character while maintaining simplicity, ensuring it remains on-trend for years to come.



Materials Needed:
Before you embark on your DIY project, it’s important to gather all the necessary materials. Here’s what you’ll need:
- Cement mix, plaster or drywall mud
- Water
- Trowel
- Sandpaper (various grits)
- Paintbrushes (different sizes)
- Painter’s tape
- Plastic sheeting
- Faux finishing tools (like sponges, rags, brushes)
- Optional sealant for protection
Preparation Before You Begin Your Wall Transformation
Before diving into your exciting DIY project, it’s crucial to set the stage and gather all the necessary materials. This section will walk you through the key steps to ensure a flawless outcome.
1. Evaluate Your Wall
Start by assessing the current state of your wall. Is it smooth or textured? Are there any imperfections or damages that need attention before applying the concrete finish? A solid foundation is essential for optimal results.
2. Clean and Fix
Give your wall a thorough cleaning with a mild detergent and water solution. Eliminate any dirt, dust, or grease that could interfere with proper adhesion of the concrete mixture. Patch up cracks or holes with an appropriate filler and allow it to dry completely.
3. Protect Surrounding Areas
Safeguard nearby furniture, floors, and fixtures with drop cloths or plastic sheets to prevent accidental spills during application. Be extra cautious around electrical outlets – remember to turn off power supply if needed.
4. Safety Precautions
Wear protective gear like gloves, goggles, and a mask when working with construction materials to shield yourself from dust and chemical irritants.
Step-by-Step Guide to Achieving the Concrete Look
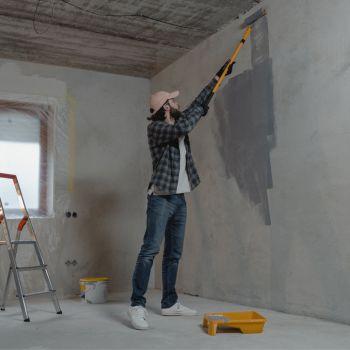
Achieving the look of concrete walls may seem like a challenging task, but with the right guidance and techniques, you can create stunning results. In this step-by-step DIY guide, I will take you through the process of giving your walls a concrete finish.
1. Prepare Your Foundation
Before diving into any project, it’s essential to properly prepare your walls. Start by thoroughly cleaning the surface to remove any dirt or debris. Fill in cracks and holes with spackling compound and sand them down for a smooth finish.
2. Apply Primer
To ensure that the concrete finish adheres properly, use a primer designed for masonry surfaces. Coat your wall evenly using a roller or brush and allow it to dry as per manufacturer instructions.
3. Mix Your Concrete Overlay
Now it’s time to mix your concrete overlay material following the instructions on the packaging carefully. Aim for a consistency similar to pancake batter by adjusting water-to-mixing powder ratios accordingly.
4. Begin Application
Starting from one corner of your wall, work in small sections at a time. Use a trowel or putty knife to apply thin coats (about 1/8 inch thick) of mixed concrete onto the surface ensuring each layer is smooth before moving on.
5. Create Texture
To achieve an authentic look, experiment with tools like sponges, brushes, or crumpled plastic wrap while the overlay is still wet to create texture on your wall until you’re satisfied with how it looks.
6. Allow Drying Time
After applying and texturing all sections of your wall, give ample drying time for each layer (usually around 24 hours). Refer back to product instructions for specific drying times if needed.
7. Clean Up Excess Material
Once fully dried, use sandpaper or sanding block gently to smooth out any imperfections ensuring seamless finishing touches are achieved.
8. Seal Your Wall Surface
Enhance durability and protect your faux cement surface by applying sealer designed for masonry surfaces according to manufacturer instructions using either brush or roller technique across the entire surface area evenly.
Inspiration for Your Concrete Wall
Elevate your interior design with the versatile style of industrial cement. The solid, modern look adds sophistication to any room, whether you’re aiming for an urban loft vibe or a minimalist aesthetic.
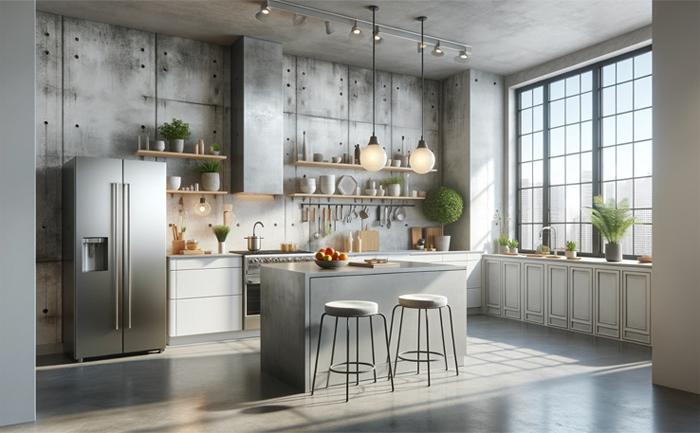
Creative ways to incorporate the commercial look:
- Create an Accent Wall: Make a statement by turning one wall into a stunning concrete masterpiece. This focal point will add an edgy yet elegant feel to your room.
- Fireplace Transformation: Give your fireplace a makeover by covering it with faux panels or textured plaster finishes. The contrast between the warmth of the fire and coolness of the cement creates a striking visual impact.
- Kitchen Upgrade: Install a durable and easy-to-clean concrete backsplash behind your stove or sink for added texture that complements various kitchen styles.
- Spa-like Bathroom Walls: Elevate your bathroom’s ambiance with textured plaster or cement tiles on the walls, creating a serene atmosphere perfect for relaxation.
- Outdoor Oasis: Extend the beauty of concrete outdoors by incorporating it into patios, garden walls, or pool surrounds for durability in different weather conditions while maintaining visual appeal.